Document processing occurs in Perceptive Content Workflow and Perceptive Experience Workflow.
Contents
Access Workflow in Perceptive Experience
Access the Perceptive Experience Workflow by clicking on the Workflow button

Based on your permissions, you might have multiple Workflow queues. You could be involved in a Business Process workflow like Admissions or Registrar, or you might manage an AP workflow queue for approving invoices, travel reimbursements, or other documents.
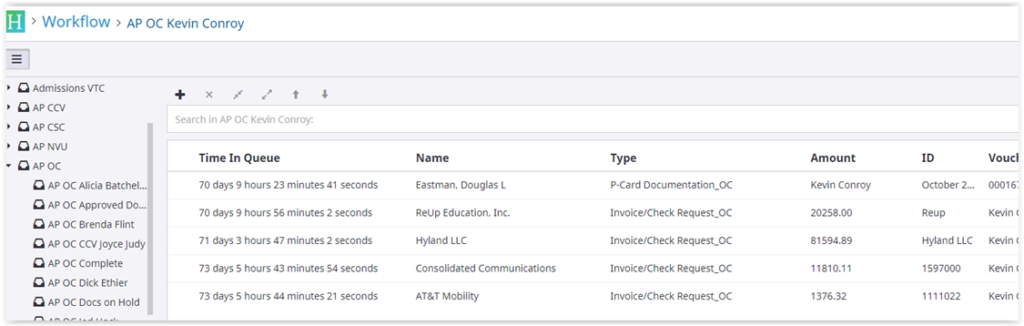
Select a Workflow
After selecting a workflow, documents will appear within your workflow as follows:
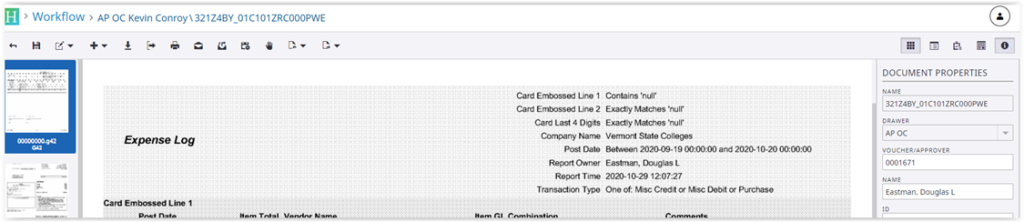
To open a document, click on it. Once opened, you’ll see Thumbnails, the main Document viewing window, and the Document Properties tab. The top menu will also include Workflow-related buttons.
The main document manipulation menu at the top now includes several workflow-related buttons.

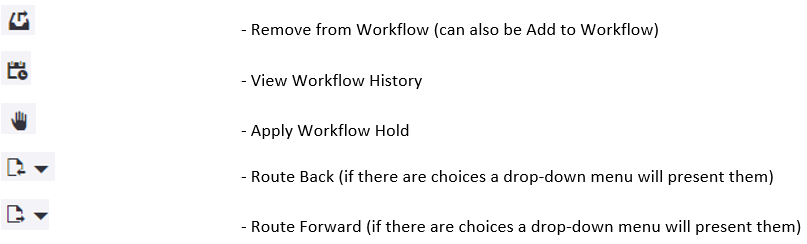
The buttons that are available in workflow include:
- Remove from Workflow (can also be Add to Workflow)
- View workflow History
- Apply Workflow Hold
- Route Back (if there are choices a drop-down menu will present them)
- Route Forward (if there are choices a drop-down menu will present them)
Workflow Process
Review and annotate
The workflow involves reviewing and annotating (stamping) a document. Here, we’re looking at Doug’s P-Card Expense Log in his supervisor’s queue. The supervisor reviews the expenses and, when ready to sign off, annotates the document and clicks “Route Forward” to proceed.
Route
Most of the Accounts Payable (AP) queues are designed for document review and stamping and “Sequential Auto” will be the only option for routing.
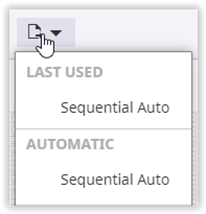
This is the default route for most AP workflows. For non-AP workflows, you will see other queue names to choose from.
See below an example of the “Route Back” routing option:

As a reminder, the options you see depend on your account permissions. Documents are usually not routed back unless there is an issue.
Once the document has been annotated and routed forward you should no longer see that item in your workflow queue.
Additional Resources
- Perceptive Content: Annotations
- Perceptive Content: Document Processing
- Perceptive Content: Viewing Documents
- Searching for documents in Perceptive Content
Still having trouble?
If you are having trouble, please reach out to the Helpdesk for further assistance.